Playwright testing with GitHub Actions: from manual runs to automated
In my last article, we laid the groundwork. In this edition, we’ll level up with automatic triggers, multiple job executions, and real-time Slack notifications. Let’s turn simplicity into efficiency!

In the previous article, we built the simplest possible GitHub Actions workflow for Playwright tests. We went step by step through the process of creating a workflow file, defining a job, checking out code, setting up Node.js, installing dependencies and browsers, running smoke tests, and finally uploading the report as an artifact. With that setup, you now have a working CI pipeline that runs your Playwright tests on demand.
If you’ve missed it, check it out here: Playwright testing with GitHub Actions: building your own basic workflow.
In this article, we’ll take it a step further — enhancing the workflow with automatic triggers, multiple jobs, and Slack notifications, which make your CI pipeline more powerful and production-ready.
Automatic triggers
Automatic triggers help make the testing process more predictable and stable. They allow us to run checks on every new pull request, which helps find defects early. Scheduled nightly runs can detect problems with tests and verify the system over time. Release and tag triggers check the build quality before deployment. Overall, these triggers reduce manual tasks, speed up feedback, and make the testing process more reliable and consistent.
Here’s what the workflow block looks like for pull requests:
on:
  pull_request:
    branches: [ main ]
This means that a workflow will start whenever a pull request is opened in the main branch, and it may be best suited for running a smoke test suite to ensure that nothing critical has been broken by the changes.
This will be the one I’ll use to upgrade the previous version of the workflow from the first article.
And this one is for a scheduled workflow:
on:
  schedule:
    cron: ' 0 8 * * 1-5'
It would trigger the workflow every working day (Monday to Friday) at 8:00 UTC, which can be useful for running regression test runs. To customize this for your needs, I recommend using this handy website crontab.guru, which offers an easy way to create a setup that works for you.
Lastly, the tag and release examples:
on:
  push:
    tags:
      - v1.**
This will activate the workflow on each new minor release and patch creation. For this to work, make sure the tags in your project follow the naming convention specified in the pattern here. For more information on how the pattern works, refer to the official documentation.
on:
  release:
    types: [prereleased]
This triggers the workflow whenever a pre-release is published. It can be helpful if you want to run tests before the release goes live.
The choice among these options depends on your automated testing strategy and the specific model used by the product team for which you're configuring this, as there are several, with trunk-based, GitFlow, and release-based models being the most popular.
Slack notifications
After setting up an automatic workflow trigger, a new question arises: how to monitor triggered workflows and their results? For the authors or their immediate teammates, it’s not an issue. If you know what workflow you’re looking for, you can check it in the Actions tab on GitHub, use a plugin in your IDE, or use the gh CLI. But when it comes to managers who want to know what the status is, and don’t need to dive deep into the technical implementation of the thing?
In this case, a Slack notification can serve as a great way to visualize the workflow runs.
Simply put, your workflow can send a notification to any Slack channel you choose, under any condition you specify. The additional step here would be to set up the Slack webhook.
Create a Slack Webhook
Here’s a short instruction on how to do it:
Create a new channel or find one where you would like the notifications to be posted.1
Create a custom Slack app: Go to the Slack API, choose “Your Apps”, then “Create New App” from scratch or go by this link. Name it as you want, pick your current workspace, and click “Create App”.
Enable Incoming Webhooks: In the app settings, select “Incoming Webhooks” and toggle them on.2
Generate your webhook: Click “Add New Webhook”, select the previously created channel, and click “Allow”.
Copy the Webhook URL.3
That’s it — your Slack channel and webhook are ready to use!
To ensure your webhook is working, run this command in the terminal with your webhook to see the message posted in the channel:
curl -X POST -H 'Content-type: application/json' \
  --data '{"text":"Hello World!"}' \
  https://hooks.slack.com/services/XXX/YYY/ZZZ
Add a Slack Webhook to the repository secrets
The webhook is a secret; it’s better to store it in a repository securely and avoid using it openly in the workflow.
Here goes a simple guide on how to do it; a more detailed one you can find in the official documentation:
Go to your repository on GitHub.
Go to “Settings”
Find “Secrets and Variables” in the Security section
Select “Actions” (for GitHub Actions workflows)
Add a New repository secret
Once this is completed, you can use the secret in the workflow.
Add a notification step in the workflow
Now that all the prerequisites are in place, you can add a corresponding action to the workflow. The simplest possible thing to do would be to add a new step with the curl command at the beginning of the workflow, like this:
- name: Post a start message in a Slack channel
env:
SLACK_WEBHOOK_URL: ${{ secrets.SLACK_WEBHOOK_URL }}
run: |
curl -X POST -H 'Content-type: application/json' \
--data '{"text": "Simple suite pipeline started"}' \
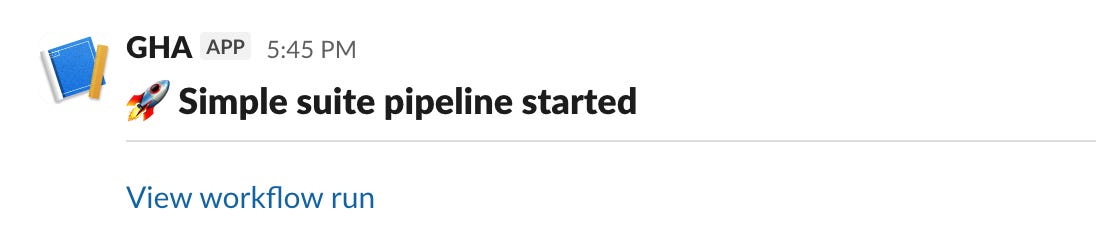
$SLACK_WEBHOOK_URL - where SLACK_WEBHOOK_URL is the name of the secret you gave the webhook at the previous step. After the workflow is run, a new message will appear in your Slack channel.
The curl works well for very simple, one-line notifications to a single channel where you don’t need rich blocks, threads, or updates, and you want zero dependencies and complete control over the raw HTTP call. Here’s what it looks like now:

There are other options, though. For instance, you can use a dedicated action designed for this purpose, like so:
- name: Post a start message in a Slack channel
  uses: slackapi/slack-github-action@v2.1.1
  with:
    webhook: ${{ secrets.SLACK_WEBHOOK_URL }}
    webhook-type: incoming-webhook
    payload: |
      blocks:
        - type: “header”
          text:
            type: “plain_text”
            text: “🚀 Simple suite pipeline started”
        - type: “divider”
        - type: “section”
          text:
            type: “mrkdwn”
            text: “<${{ github.server_url }}/${{ github.repository }}/actions/runs/${{ github.run_id }} | View workflow run>”
This way, you can use blocks to create a better message, call the Slack API, or else. Here’s what this block message looks like:
But to demonstrate its capabilities, here is an example of its potential reach:
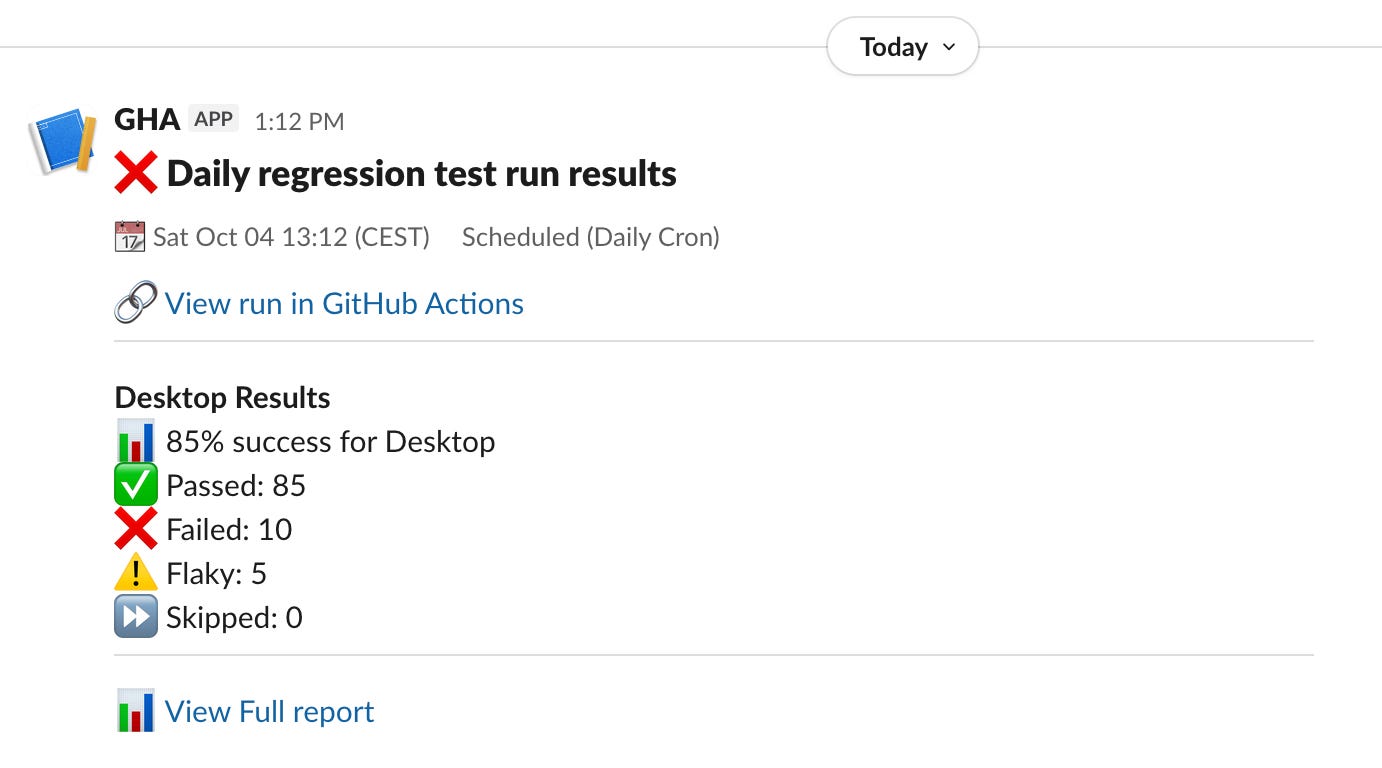
If you're curious about how to craft a message like this, leave a comment, and I’ll share it as a bonus article.
Parallel and sequential jobs
Usually, when it comes to notifications, we prefer to receive one notification per event, such as when a workflow has started, succeeded, or failed. In the solution above, there is only one at the beginning of the workflow, notifying that the workflow has started.
The steps in the job are executed sequentially. But since these two tasks - sending a start notification and actually running tests - are independent of each other, you can isolate the send notification step as a separate job.
Separating logic in GitHub Actions and pipelines is crucial because a failure in one step prevents subsequent steps from executing. That is, when creating a job, ensure it only includes the essential steps to enhance its reliability.
As an added benefit, running jobs in parallel when possible speeds up workflow run time, resulting in shorter feedback cycles.
The code for this piece looks like this:
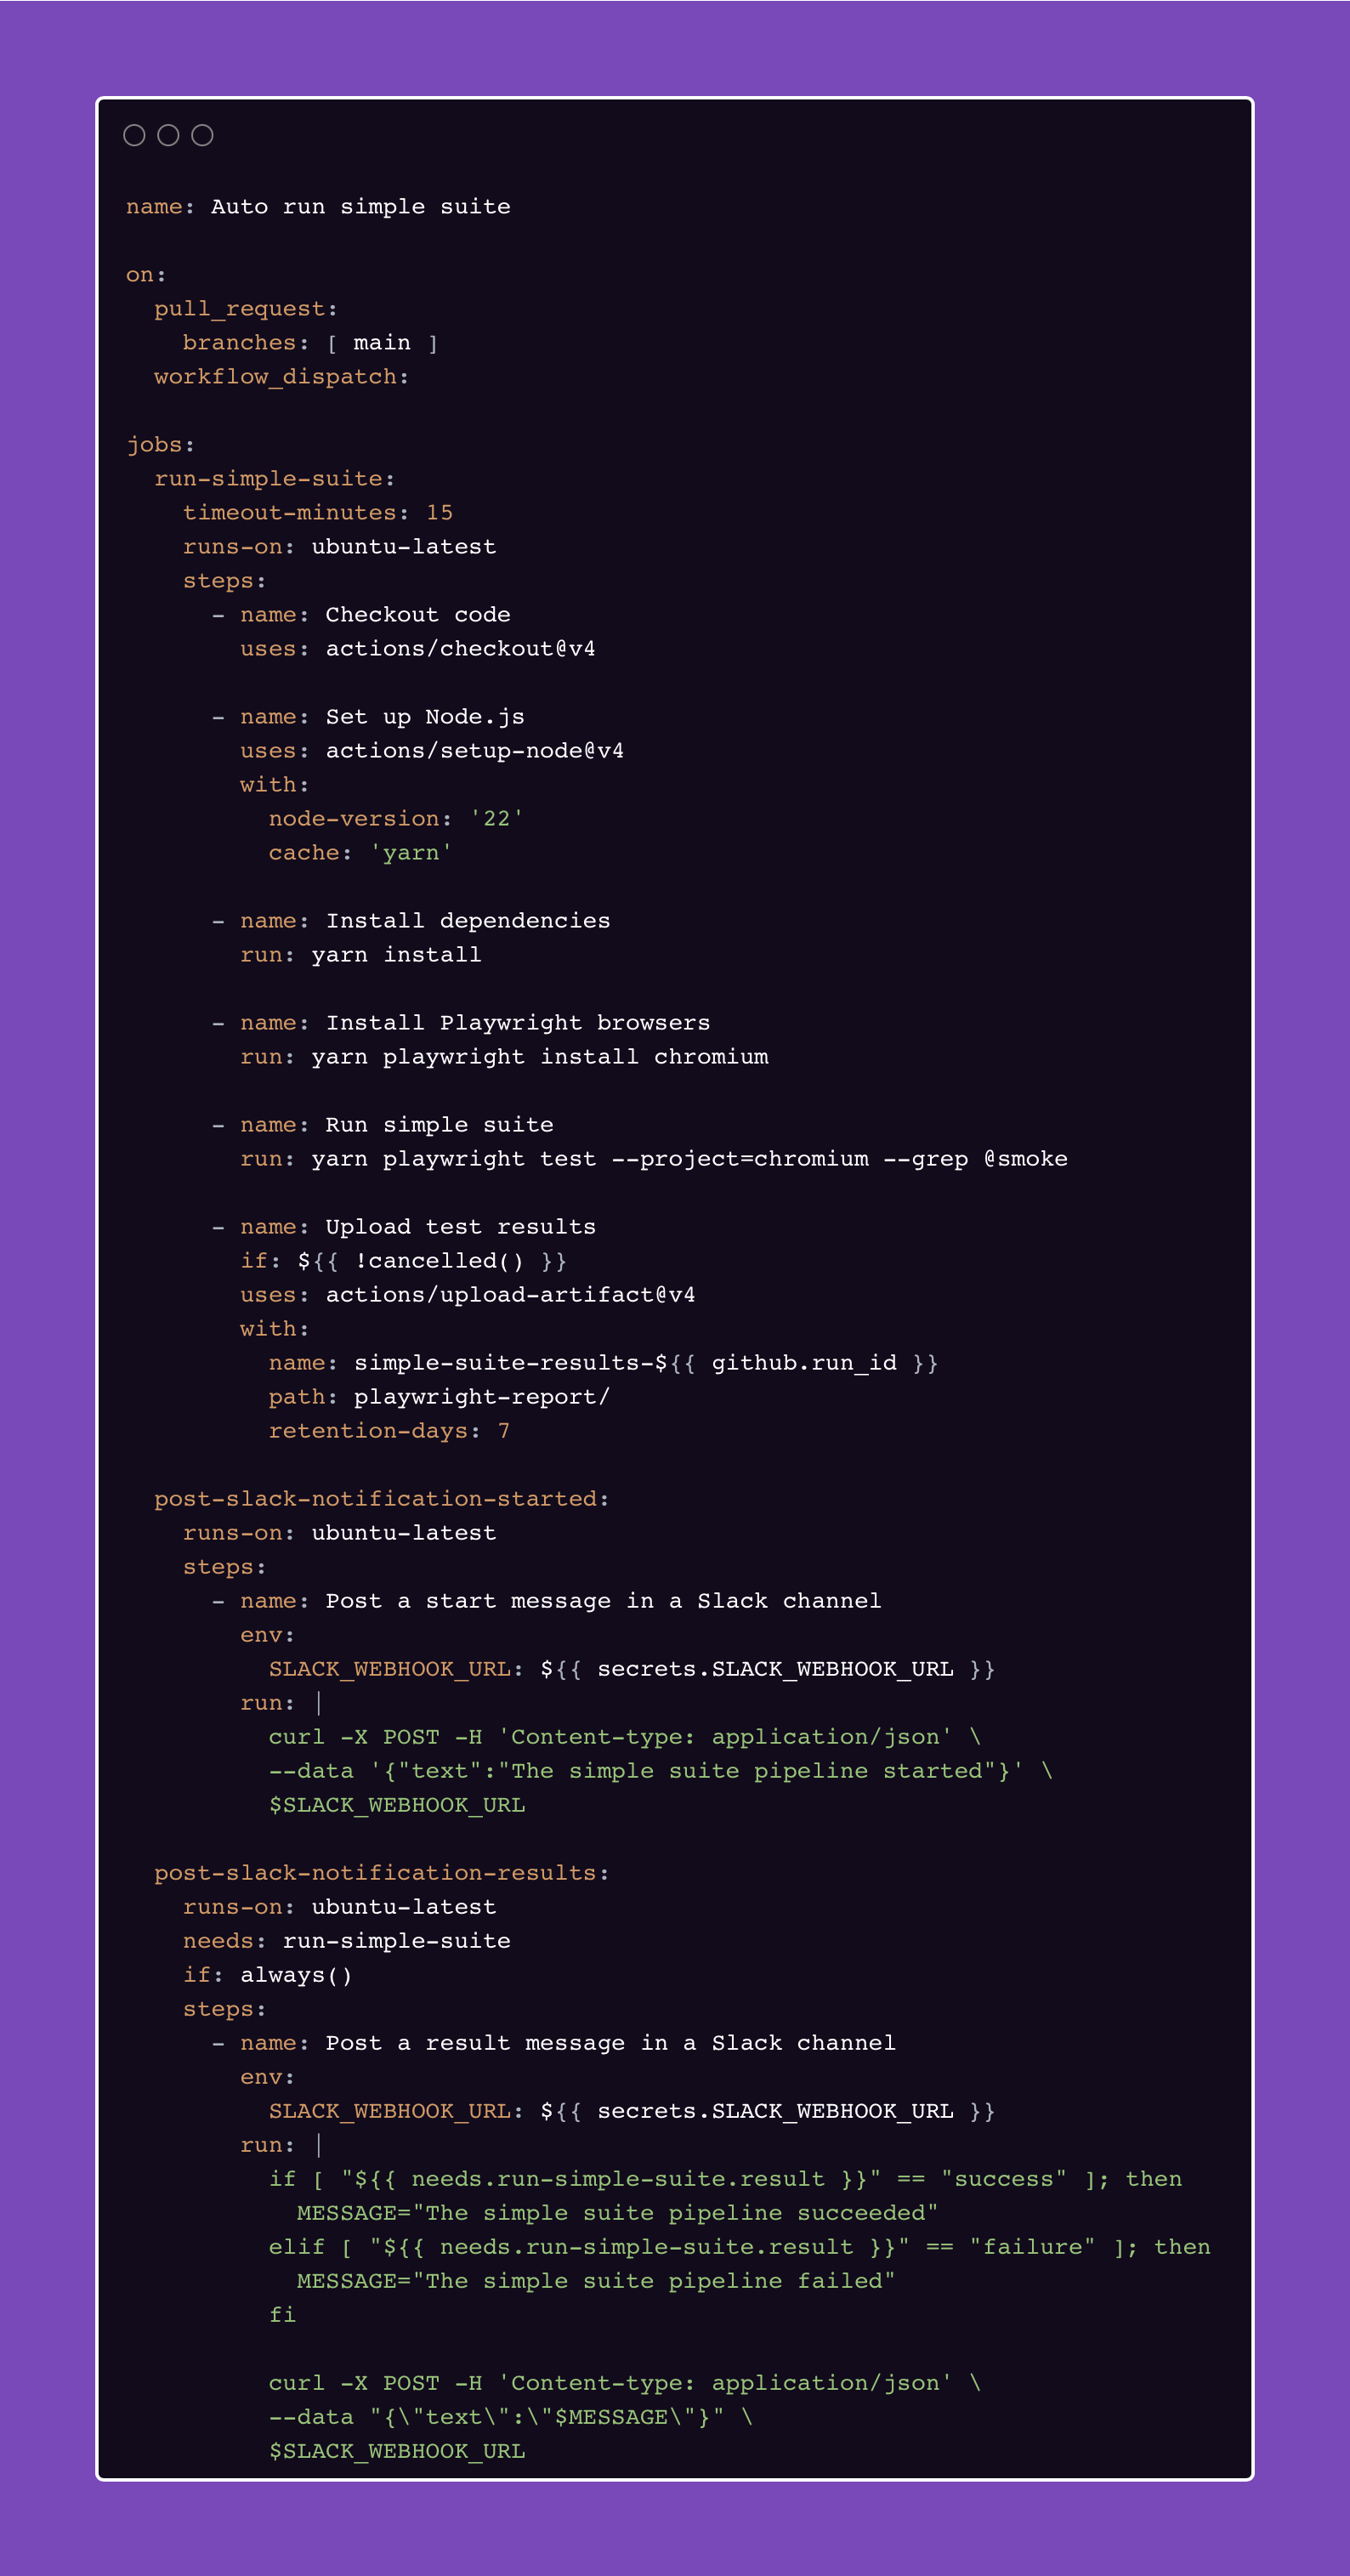
post-slack-notification-started:
    runs-on: ubuntu-latest
    steps:
      - name: Post a start message in a Slack channel
        env:
          SLACK_WEBHOOK_URL: ${{ secrets.SLACK_WEBHOOK_URL }}
        run: |
          curl -X POST -H 'Content-type: application/json' \
          --data '{"text":"Simple suite pipeline started"}' \
          $SLACK_WEBHOOK_URL
It doesn’t matter where you place it in the file, at the beginning or at the end; it will work in parallel in either case.
Apart from the start message, there are two more cases to consider: the success and failure of the run. These depend on the results of the run-simple-suite job, so they must wait for it to finish, making them sequential to it.
To run a job in sequence, you must explicitly specify this by adding the needs option. Also, there should be an if condition that determines when this job needs to be executed. If the condition is not met, the job will be skipped. It can look like this:
post-slack-notification-success:
  runs-on: ubuntu-latest
  needs: run-simple-suite
  if: success()
  steps:
    - name: Post a success message in a Slack channel
      env:
          SLACK_WEBHOOK_URL: ${{ secrets.SLACK_WEBHOOK_URL }}
      run: |
        curl -X POST -H 'Content-type: application/json' \
        --data '{"text":"The simple suite pipeline succeeded"}' \
        $SLACK_WEBHOOK_URL

post-slack-notification-failure:
  runs-on: ubuntu-latest
  needs: run-simple-suite
  if: failure()
  steps:
    - name: Post a failure message in a Slack channel
      env:
          SLACK_WEBHOOK_URL: ${{ secrets.SLACK_WEBHOOK_URL }}
      run: |
        curl -X POST -H 'Content-type: application/json' \
        --data '{"text":"The simple suite pipeline failed"}' \
        $SLACK_WEBHOOK_URL
Or you can unify it like this, using the result of the run-simple-suite, which can be called through needs:
post-slack-notification-results:
  runs-on: ubuntu-latest
  needs: run-simple-suite
  if: always()
  steps:
    - name: Post a result message in a Slack channel
      env:
        SLACK_WEBHOOK_URL: ${{ secrets.SLACK_WEBHOOK_URL }}
      run: |
        if [ "${{ needs.run-simple-suite.result }}" == "success" ]; then
          MESSAGE="The simple suite pipeline succeeded"
        elif [ "${{ needs.run-simple-suite.result }}" == "failure" ]; then
          MESSAGE="The simple suite pipeline failed"
        fi

        curl -X POST -H 'Content-type: application/json' \
        --data "{\"text\":\"$MESSAGE\"}" \
        $SLACK_WEBHOOK_URL
Final Workflow
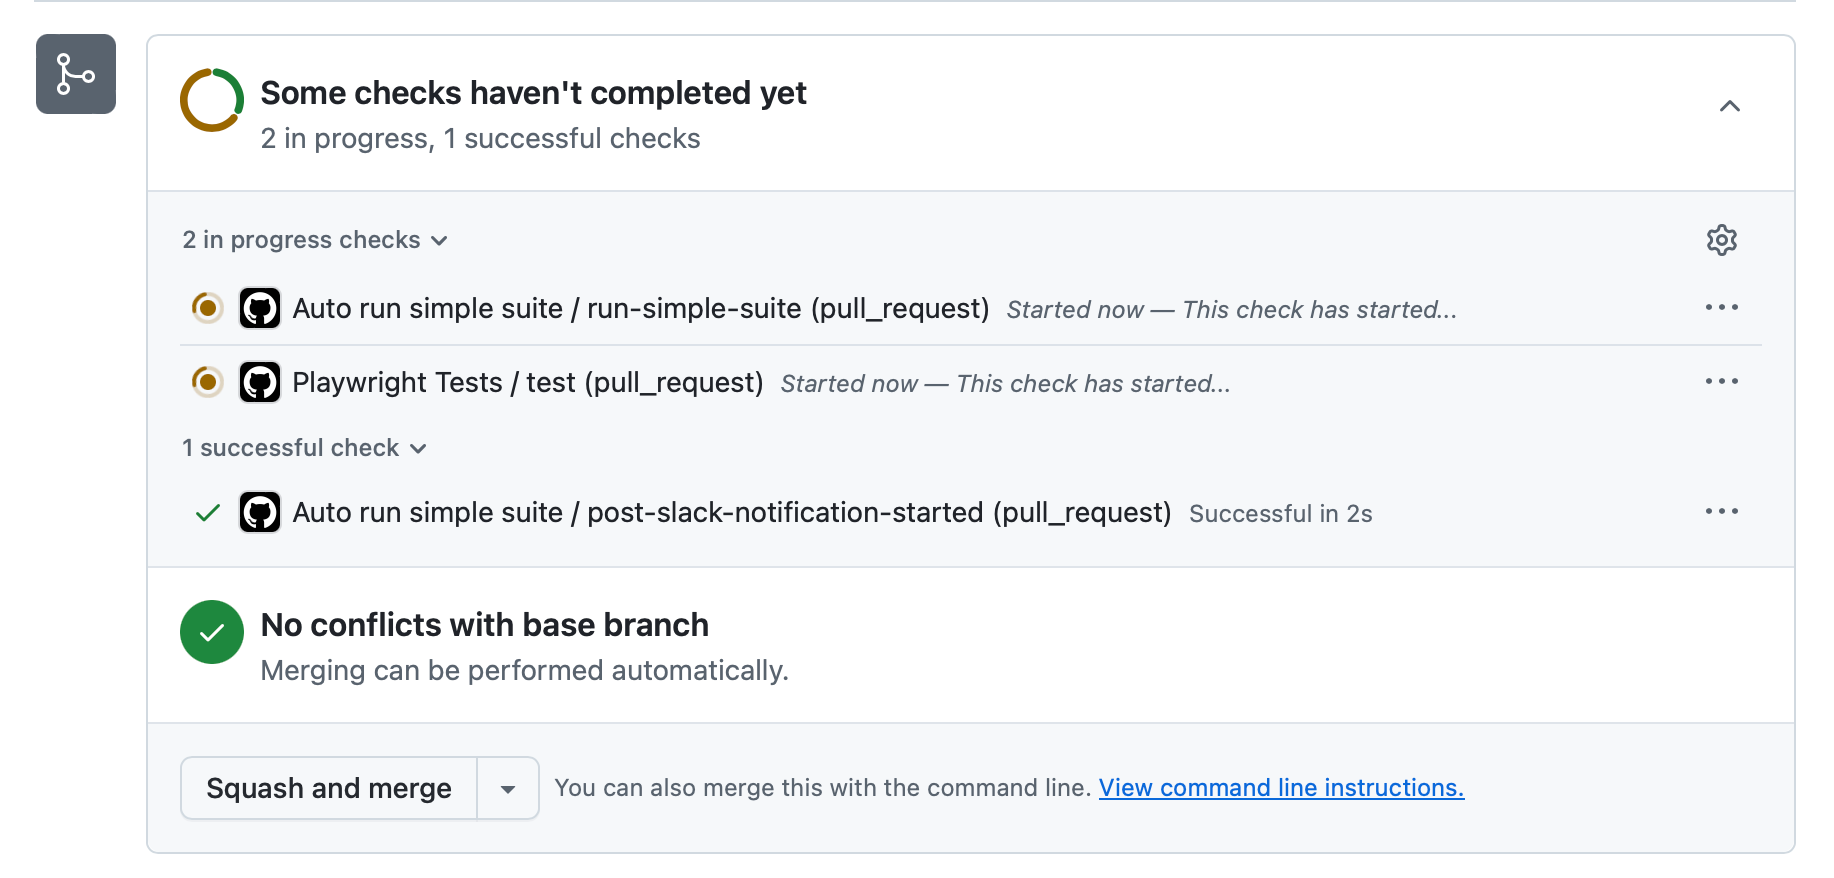
Run it
Next time, when a pull request is opened to the main branch, this workflow will be automatically triggered. You can find the results at the bottom, where all checks are displayed, or in the Actions tab.
Recap
From a simple Playwright smoke-test runner, we’ve now built a more production-ready CI pipeline with:
Automatic triggers (PRs, schedules, releases) to catch issues early
Slack notifications to keep the whole team in the loop
Parallel & sequential jobs for faster, more reliable workflows
The result: reduced manual effort, faster feedback, and improved visibility for both developers and stakeholders.
Looks nice, doesn’t it?
But what if your repository has not just one, but several pipelines — and you want them all to reuse the same core logic without repeating yourself?
That’s what we’re diving into next! We’ll explore how to create a reusable building block that multiple workflows can call. This strategy will not only keep your projects consistent and modular but also make them a breeze to maintain.
A webhook is strictly tied to the selected channel. To post to a different channel, you will need to create a separate webhook for it.
If you’re unable to create apps or enable webhooks, your organization might need admin approval for custom apps.
Never share the webhook URL publicly, as anyone with it can post to your channel. If it gets compromised, delete it and generate a new one.